Tuesday 30 November 2010

Using a Stencil

One of Adrienne’s swaps was to make anything we liked, the only proviso being to use a stencil.
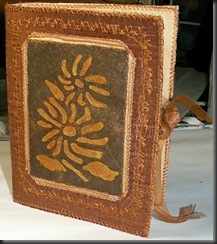
After a couple of false starts, I decided to make a postcard/photograph album for my swap partner.
I used Golden Moulding Paste to create a stencil on some black lutradur.  When this was still wet it was  sprayed with some gold spray paint and  when  it was dry treasure gold  was used to highlight .
A piece of pelmet Vilene to the size needed, and creased well were the spine was to be. This was covered with some silk from my stash (  purchased it on E-Bay).
 Thestencilled lutradur  was mounted onto a piece of light coloured felt covered with cream silk, and stitched on the flowers and stems with a coppery coloured maderia thread.  I used a fancy stitch in the same thread around the edge.  This was then attached this to the front of the book, using  a small zigzag stich.
Somefancy machine stitching around the edges of the book and on the spine, finished it of. For the ties,I used ribbon, which was pinned at each edge to keep it in place.The back of the pelmet vilene was covered with a piece of cream silk, and zig-zag stitched around the edges, removing the pins as I got to them. The ribbons were threaded through wooden beads, which were tied close to the edges of the covers. To finish off the photo holders were stuck in, using book binders glue.
                  
                                                      .KONICA MINOLTA DIGITAL CAMERA

Metal Inchies

                          Metal Inchies


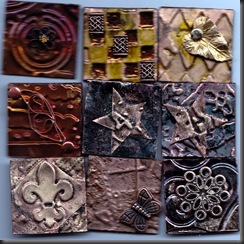
I made these for a swap I was in. We had to make 9 metal inchies and they got swapped out. There were 5 of us in the swap, meaning we got at least one of our own back.

I was running short of time, so mine were made using embossing folders for the backgrounds/  Some I coloured  using treasure gold, alcohol inks and black gesso.A couple of them I coloured with a candle flame.  I added various bits and pieces from my stash, and cut out a couple of embossed metal stars to attach to the darker backgrounds. One the middle top one, I used some glass paint in the ‘dips’ and added some glitter while it was still sticky. The one with the butterfly I used embossing powder. Good fun to relax doing these after a hectic few days.

Saturday 6 November 2010

Dots and Circles


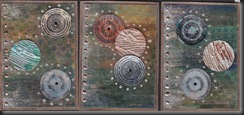
A swap making anything we liked as long as it incorporated dots and circles. I decided to make ATCs.

                     2010 - Nov Circles and dots ATC's


The background is painted pelmet Vilene which I already had.( I usually use left over paints to colour anything I have laying around !)

I stamped onto different papers and cut out the circles. I added a small black gem to some of them, and arranged on the backgrounds. I used dimensional  paint to add the dots at the sides, and gold acrylic to add the dip dots around the circles. Hope my swap partner likes them.

Fabric Paper Birds


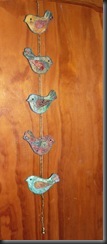
I have been busy making fabric paper birds for a swap I am in. Great fun, and I am sure I will be making more.
I found a template for a bird, but you could draw your own. The first ones I made were about 6 inches across, but I thought they were too big, so I reduced the size to approximately 4 inches, and I like them I lot better.
I had a stack of fabric paper, so got this out and cut out 5 double sided bodies (making sure I turned the template around for the backs). I then stamped all the bodies randomly, with the first stamps that came out of my stash. I cut out 10 wings and 30 tail feathers (shaped like small wings). I machined stitch all the wings and tail feathers into place, using a variegated thread and a fancy stitch.
I decided that I was going to put some felt in the middle to give the birds a little body.
I choose a ribbon, and leaving enough at the top and bottom, I put the ribbon between the back and front of the bird bodies. To keep it all in place I stuck each bird with some glue.
I then machine stitched using the same variegated thread and a small zig- zag stitch on both sides.
To finish off I added black gems for eyes and used a glitter pen to highlight some of the pattern. I made a loop at the top, decorated with a few seed beads, and added a bell to the bottom of the ribbon.

                                                              KONICA MINOLTA DIGITAL CAMERA