Friday 17 December 2010

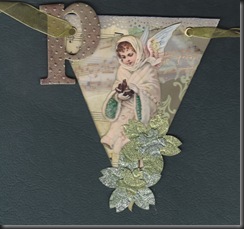
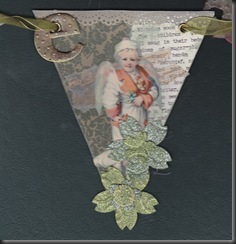
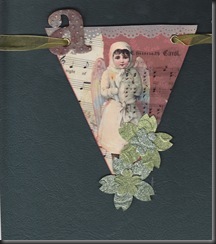
Christmas Banner

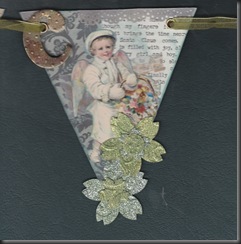
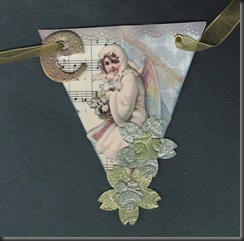
This is really not something that I would normally think of making., but the girls I meet with on a Wednesday choose to do it this week. I actually quite enjoyed making it, so much that I finished it off at home.  A happy and peaceful Christmas to you all.
Christmas 2010 Peace1Christmas 2010 Peace2Christmas 2010 Peace3Christmas 2010 Peace4Christmas 2010 Peace5

Thursday 16 December 2010

Fabric Postcard

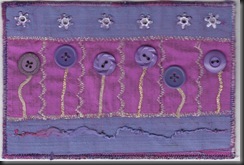
I just love making these. Hope my swap partner likes it.
                    Postcard for Claudia


Pieces of
coordinating silk stitched together with decorative stitches, and the middle piece stitched to make six spaces for the flowers.   I added eyelets to the top, zig-zag stitched pieces of gold cord to make stems and added a selection of buttons for the flower heads.  A piece of thread was attached , with a few small beads added here and there.

Technorati Tags: Fabric postcard,silk,buttons,eyelets,gold cord

Book Page ATCs


I had a bit of fun with this one. Hope my partner sees the humour!

                         Bookpages ATC


I’d picked up this book in a charity shop ages ago, was just waiting for the right project to come along so I could use it.

Wednesday 1 December 2010

Altered Frame

                          002


My friend Esther gave me a couple of plain wooden frames to play with. This is one of them completed, although the picture really doesn’t do the colour of it justice.

Firstly the frame was covered in bits and pieces of fabric paper, stuck with bookbinders glue. When dried, several thin coats of Golden Liquid Acrylics were added, not sure how many but at least 4. The final coat was Iridescent Copper Light.

A piece of silk was stamped with a calligraphy background stamp, using Versafine Vintage Sepia.

A piece of stamp board, the same Versafine ink and a Paper Artsy stamp produced the centre piece.

This was assembled and then what to do to finish it off?  I found the edging in my stash, coloured it with a quick wipe over with the iridescent copper and attached to the frame using thin double sided tape.

Something was needed for the top, and in my bits and pieces tray I found Remember, left over from a previous project. It was ‘dirted’ up a little and mounted on a small piece of wire mesh, which was then attached to the frame using double sided tape.
Tuesday 30 November 2010

Using a Stencil

One of Adrienne’s swaps was to make anything we liked, the only proviso being to use a stencil.
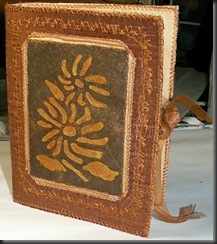
After a couple of false starts, I decided to make a postcard/photograph album for my swap partner.
I used Golden Moulding Paste to create a stencil on some black lutradur.  When this was still wet it was  sprayed with some gold spray paint and  when  it was dry treasure gold  was used to highlight .
A piece of pelmet Vilene to the size needed, and creased well were the spine was to be. This was covered with some silk from my stash (  purchased it on E-Bay).
 Thestencilled lutradur  was mounted onto a piece of light coloured felt covered with cream silk, and stitched on the flowers and stems with a coppery coloured maderia thread.  I used a fancy stitch in the same thread around the edge.  This was then attached this to the front of the book, using  a small zigzag stich.
Somefancy machine stitching around the edges of the book and on the spine, finished it of. For the ties,I used ribbon, which was pinned at each edge to keep it in place.The back of the pelmet vilene was covered with a piece of cream silk, and zig-zag stitched around the edges, removing the pins as I got to them. The ribbons were threaded through wooden beads, which were tied close to the edges of the covers. To finish off the photo holders were stuck in, using book binders glue.
                  
                                                      .KONICA MINOLTA DIGITAL CAMERA

Metal Inchies

                          Metal Inchies


I made these for a swap I was in. We had to make 9 metal inchies and they got swapped out. There were 5 of us in the swap, meaning we got at least one of our own back.

I was running short of time, so mine were made using embossing folders for the backgrounds/  Some I coloured  using treasure gold, alcohol inks and black gesso.A couple of them I coloured with a candle flame.  I added various bits and pieces from my stash, and cut out a couple of embossed metal stars to attach to the darker backgrounds. One the middle top one, I used some glass paint in the ‘dips’ and added some glitter while it was still sticky. The one with the butterfly I used embossing powder. Good fun to relax doing these after a hectic few days.

Saturday 6 November 2010

Dots and Circles


A swap making anything we liked as long as it incorporated dots and circles. I decided to make ATCs.

                     2010 - Nov Circles and dots ATC's


The background is painted pelmet Vilene which I already had.( I usually use left over paints to colour anything I have laying around !)

I stamped onto different papers and cut out the circles. I added a small black gem to some of them, and arranged on the backgrounds. I used dimensional  paint to add the dots at the sides, and gold acrylic to add the dip dots around the circles. Hope my swap partner likes them.
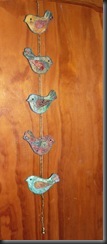
Fabric Paper Birds


I have been busy making fabric paper birds for a swap I am in. Great fun, and I am sure I will be making more.
I found a template for a bird, but you could draw your own. The first ones I made were about 6 inches across, but I thought they were too big, so I reduced the size to approximately 4 inches, and I like them I lot better.
I had a stack of fabric paper, so got this out and cut out 5 double sided bodies (making sure I turned the template around for the backs). I then stamped all the bodies randomly, with the first stamps that came out of my stash. I cut out 10 wings and 30 tail feathers (shaped like small wings). I machined stitch all the wings and tail feathers into place, using a variegated thread and a fancy stitch.
I decided that I was going to put some felt in the middle to give the birds a little body.
I choose a ribbon, and leaving enough at the top and bottom, I put the ribbon between the back and front of the bird bodies. To keep it all in place I stuck each bird with some glue.
I then machine stitched using the same variegated thread and a small zig- zag stitch on both sides.
To finish off I added black gems for eyes and used a glitter pen to highlight some of the pattern. I made a loop at the top, decorated with a few seed beads, and added a bell to the bottom of the ribbon.

                                                              KONICA MINOLTA DIGITAL CAMERA

Sunday 31 October 2010

Friendly Plastic


Last weekend I attended a Friendly Plastic Course with  Liz Welch, which was run  in the beautiful Chepstow Castle.

                        Chepstow Castle


I don’t have very much experience with Friendly Plastic, but Liz is a wonderful teacher and the week-end was thoroughly enjoyable, meeting up with old friends Adrienne and Liz Gale and hopefully meeting new friends. We shared an evening meal on the Saturday, great fun and good food too!

The object of the course was to teach us how to work with Friendly Plastic in a 3 dimensional way. On the first day  Liz took us through lots of techniques, oozing, attaching friendly plastic to itself by using a soldering iron, making right angled sides, moulding and cutting , using metal leaf and colouring Friendly Plastic pellets with alcohol inks.


                     img_0833

          Small pieces made using the various techniques.


The next day we were already to make our dimensional piece. Adrienne and I found a couple of Acorn squash, different shapes and we decided that this is what we would use for our moulds.

I used the Friendly Plastic pellets , and when these were melted sufficiently , I used lace to try to create a design. This worked very well on the inside, but I had a lot of trouble getting any design onto the outside. I , with Liz’s guidance, tried to rectify this with a heat-gun, and by holding the whole thing in the hot water, but nothing worked, due to my inexperience I must add here lol. Eventually I gave in and reheated the whole thing. I moulded it around the squash, and pressed the outside firmly, folding and smoothing to  make some texture. I then coloured it with Alcohol Inks, lettuce, butterscotch and sail boat blue. It isn’t finished yet, but I am thinking about where to go next with it! Any suggestions gratefully received…… 
                             

Sunday 17 October 2010

Grungepaper 2

              
                             Grungepaper Canvas
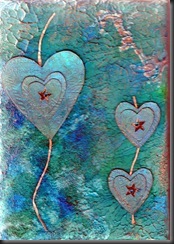
I wasn’t particularly happy with my first effort, so thought I would have another go. I had a ready to go canvas, one which had been covered with various mediums to give texture. It was not quite the colour I wanted , but I changed it by using Starburst stains and Treasure Gold Copper to highlight some of the texture.
I cut out the hearts coloured and then embossed them, using a small Sizzix embossing folder.I stuck the hearts together and used a star sequin and a stick on heart shaped jewel to finish off. I used beaten copper wire  and attached the hearts with super glue.
This is going to Adrienne , along with the bookmark when I see her next week. We are off to have a week-end of friendly plastic fun with the amazing Liz Welch.

Grungepaper 1

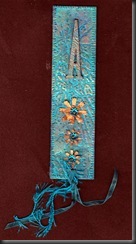
                                     Grungepaper Book Mark
I signed up for a swap where I was to use Grungepaper  in any way I chose to do so. I’ve had some Grungepaper for ages, but have never got around to using it.
I first of all made a bookmark , using two pieces of Grungepaper stitched together , and coloured using Starburst Stains. I then   embossed it, using a Sizzix embossing folder with my Wizard.
I decorated with punched flowers, sequin and a bead and added a brass eyelet to take the fibres. It didn’t look quite finished so I added a Grungeboard letter, coloured in the same way.
I hope Adrienne likes it.


Sunday 3 October 2010

Row Houses


I'd forgotten how addictive making these little pieces of art can become! Out came my saved pieces of backgrounds, images , stamps and embellishments. Here are the results. I had to make 5 for a swap, but ended up making a few more, and more house shapes ready to be finished off.

Fabric Postcard


Another fabric postcard for a swap on UK Art. For this I embellished an old scarf around the edges and for the centre I stitched on a piece of black and silver coloured paper that I'd had left over from something. Can't remember what lol. I then used an image that I had already printed onto cotton and attached this with some scribble stitching and a small piece of organza. At this point I left it, no idea where to go.
A couple of days later I was playing around with some organza and found this piece of pink. I made some organza flowers, rough circles cut out and then, using something circular in the middle to hold it down,
gently heating with a heat gun. The edges curl up around the circle, and voila there you have it. I found some black buttons ,stitched them on using a black and silver thread and added small beads to cover the holes. I used the same black and silver thread to satin stitch around the edge. I hope my partner likes it.

Friday 17 September 2010

Fabric Paper hanging

I made this fabric heart hanging for another swap on UK. I started off with some fabric paper which was almost white, not very inspiring, so I painted it with Golden Fluid Acrylic, Irridescent Gold. I was a bit heavy handed and didn't like it at all, so applied a thin coat of gesso and then wiped it straight off with a baby wipe. Much better! I added some Treasure Gold , Amethyst to highlight the creases. I then used another piece of fabric paper for the mount, and free-machine stitched with a metallic thread, and satin stiched around the edges with varigated thread. The heart  was made from yet another piece of fabric paper and stitched around with metallic thread, and edged with gold Krylon. Tiny flowers were punched from scraps of the papers and attached with a small bead to the corners of the mount, which was stuck onto the background using Golden Regular Gel Medium. I attached the embellishment to the heart, again with small beads.
The darker small tags,with the hearts, were made from scraps of the fabric paper. The lighter coloured tags were made using painted bondaweb, ironed on. The tags were attached using eyelets and ribbon.

Beads

I had to do a swap incorporating beads. It could be anything at all as long as it used beads.Whilst I was on a short break in Devon I had picked up several of these hanging 'Live'  at a car boot sale. Just right for altering!
I first  of all  removed the wire and  painted it with cinnamon Viva metal paint, and when it was dry painted again with Viva olive green metal.When it was dry I stamped it with Versamark using a scroll stamp, and  heat embossed using fine detail gold. I did this on both sides. I  threaded some gold wire though the holes to make a hanger, and using small beads threaded onto Nymo wove them through the wire. Hope my swap partner likes it.


Tuesday 14 September 2010

Tags

I was to make either 4 normal size tags or one large one for a swap, but got a little carried away!
I used ordinary white tags, sprayed on both sides with walnut ink and I then added some Jo Sonja's iridescent turquoise. I stamped on one side of the tag with 'time' images and used the masking technique to add words, both in chocolate Brilliance Ink. The back I stamped and embossed with fine gold. I added the embellishments and the flower from my stash.
Um 4 tags finished, but I wasn't particularly satisfied with them. I decided to add quotes related to time to the front of each tag. I printed these out on acetate and cut into a tag shape. I then used two bigger tags to make the covers. I coloured them in the same way,stamped words and added an acetate clock to the front. I then stamped the insides with a texture stamp, put them on a ring and added fibres to finish.

Paper Bag Books


I have participated in 2 paper bag book swaps recently. The participants made pages which were sent to the hostess for distribution. All participants were responsible for putting their own book together. The first book was entitled Nature.

My cover and spine. Made with a paper bag coloured using the credit card technique.


End pages, art by Rachel
Our second book was on Leonardo da Vinci
My pages
The completed book. This beautiful etched page was created by Annette.


A Trio of Canvases

A Canvas, a transferred image, silk paper, a pipe cleaner, some wire and some beads.
I made this canvas for a metal swap. I used moulding paste on the canvas and pressed into it with a texture stamp. When it was dry I coloured it with some spilt inks from when I coloured the metal squares and a little treasure gold to highlight .I used embossing folders on 3 of the metal squares and on the one with the flower I used metal embossing tools. The flower was punched from metal. The squares were all coloured with Spirit Inks (similar to alcohol inks )used for wood staining, and mixed with meths.
Canvas was covered with various mediums and texture stamps used. When dry it was coloured with acrylics and highlighted with treasure gold, well actually pewter I think! The jigsaw pieces were coloured with the same paints and the embellishments were from my stash.


Thank you

Thank you all for your nice comments, either on here or elsewhere. Blogger seems to have a few hiccups at the moment! I have a few more things I want to blog, and I must say it has been great revisiting earlier work. Some things I had forgotten about. For those of you who asked I will get the Folding book instructions out as soon as I can, possibly at the end of this week.

I have one pressing swap which is giving me a headache lol...I have NO idea what I am going to produce for it. Stand up Margaret lol
l.The view from outside my caravan on our recent trip to Devon.

More ATCs( with a difference.)


A set of hanging ATCs for a swap. Images are covered with organza to give a softer look.

I needed to produce something using fabric for a swap and (with thanks to Linda Baldock) I made this folding ATC. The 3 pieces are mounted on a piece of organza,


Framed Inches

I took part in an inchie swap on UKArts in which the colours to use were, soft blues, greens and white with a touch of glitter. I loved all the ones I received and just happened to have a frame which was an ideal size to display them. I used my favourite Heavy Acrylic, Transparent Burnt Umber for the frame and highlighted with a little treasure gold.
Experiments

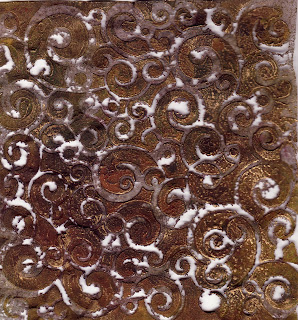
Experiments, don't we just luv 'em! Lots of failed ones and sometimes wonderful results that you wonder how on earth you will ever be able to incorporate into your work. Here are a couple I liked a lot, but haven't really used. Have to get my thinking cap on.This piece is made from lutrador. I used a stencil and applied a thin layer of moulding paste. I sprayed with colour whilst the moulding paste was wet, waited for it to dry ( I am usually to impatient to wait, but for this it was important to do so!) I then zapped it with my hotter heat gun, which is a 350w Creative Craft Tool, brilliant for fabric zapping. The result as you see is a lacy effect. I used some treasure gold lightly to highlight.
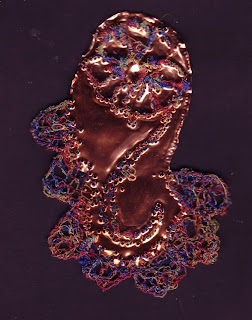
This was done at a class I attended, Stitching on Metal. It was a fun class and I love the lacy effect that I learnt to do around the edges. I started off with a piece of copper metal and a piece of stabiliser which I stamped with the flower stamp, chosen because of its simplicity lol. The whole lot was placed in an embroidery ring , stabiliser on top, and stitched with the feed dogs down. You need to do this the opposite way to free embroidery i.e slow machine! I then drew a rough scallop pattern on some cold water dissolvable stabiliser, and randomly stitched within the pattern, making sure to catch the edges of the metal and to leave no loose ends.

Monday 13 September 2010

Meander Books

This was a great swap organised by Adrienne. Each player made 2 pages for each of the other players to their chosen theme. For the pages we used canvas and pelmet vilene. Once the pages were sent to participants it was up to each individual to make them into the books, and finish the back if desired. My themes were 'Play on Words' and 'Birds'.


Play on Words Front and Backs( backs done by me)


Closed 'Play on Words' meander book.


Front and back of the Birds meander book. Some of the backs done by me.


Closed Birds meander book


M
I did a duplicate of most of my pages and made these into another book.